
How to Install a Garbage Disposal
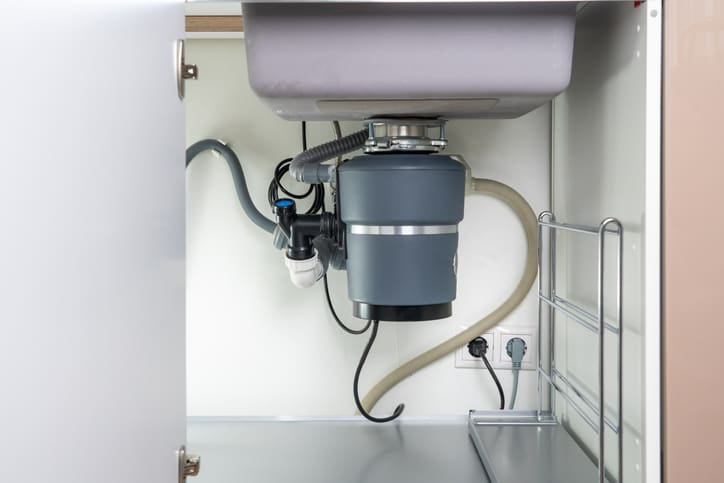
A garbage disposal is a convenient kitchen appliance that grinds food waste into small particles so it can pass through plumbing pipes. Installing a garbage disposal can help reduce food waste in trash bins and make kitchen cleanup easier.
Many homeowners can install a garbage disposal themselves with basic tools and preparation.
Tools and Materials Needed
Before starting the installation, gather the following items:
- New garbage disposal unit
- Screwdriver
- Adjustable wrench
- Plumber’s putty
- Bucket
- Electrical cord (if not included)
- Pipe wrench or pliers
Having everything ready will make the installation process smoother.
Step 1: Turn Off Power and Water
Safety should always come first.
Before installing the disposal:
- Turn off the power to the outlet at the circuit breaker.
- Turn off the water supply to the sink if necessary.
Never work on electrical appliances while power is connected.
Step 2: Remove the Existing Drain Assembly
If you are replacing an existing disposal or drain:
- Place a bucket under the sink to catch water.
- Disconnect the drain pipes.
- Remove the sink flange and old drain assembly.
Clean the sink opening thoroughly before installing the new unit.
Step 3: Install the Mounting Assembly
Most garbage disposals include a mounting bracket that attaches to the sink.
Steps:
- Apply plumber’s putty around the sink flange.
- Insert the flange into the sink drain opening.
- Secure the mounting ring and gasket underneath the sink.
This mounting assembly supports the disposal unit.
Step 4: Attach the Garbage Disposal
Lift the disposal unit and align it with the mounting ring.
Rotate the disposal until it locks securely into place. Some units twist and snap into position.
Garbage disposals can be heavy, so support the unit carefully during installation.
Step 5: Connect the Drain Line
Next, connect the disposal to the sink drain pipe.
If the sink includes a dishwasher connection, attach the dishwasher drain hose to the disposal inlet.
Tighten all connections to prevent leaks.
Step 6: Connect the Electrical Wiring
Some garbage disposals plug into an outlet, while others require direct wiring.
Follow the manufacturer’s instructions for electrical connections.
If you are unsure about electrical wiring, a licensed electrician may be needed.
Step 7: Test the Disposal
After installation:
- Turn the power back on.
- Run water through the sink.
- Turn on the disposal to ensure it operates properly.
Check for leaks around all connections.
Final Thoughts
Installing a garbage disposal can improve kitchen convenience and reduce food waste. Careful installation and proper maintenance can help ensure the unit operates reliably for many years.
Need Professional Help?
Some home projects are better handled by a professional. Angi can help you find local professionals for repairs, maintenance, remodeling, and other home projects. Click the link below to find a local pro in your area.

Find a Local Pro →https://www.tkqlhce.com/click-101849128-17141194
Affiliate disclosure: We may earn compensation if you use links on this page.

Article Disclaimer
The information provided in this article by YourRealEstateAdviser.com is for informational and educational purposes only and should not be considered legal, financial, real estate, or professional advice.
While we strive to provide accurate and up-to-date information related to real estate, markets, buying, selling, and investing, we make no guarantees regarding the completeness, accuracy, or reliability of any content.
Real estate decisions involve significant financial and legal considerations. You should consult with a licensed real estate agent, attorney, financial advisor, or other qualified professional in Kentucky or your applicable jurisdiction before making any decisions.
Any examples, projections, or potential outcomes discussed are illustrative only and are not guarantees of results. Your outcomes may vary based on market conditions and individual circumstances.
This article may contain affiliate links. We may earn a commission at no additional cost to you if you choose to make a purchase through these links.
By reading this article, you acknowledge that you are solely responsible for your decisions and actions.